f you want to get the best window tints for your car, there are some important factors to consider before making your pick. Tinting your windows doesn’t only look really cool, but it also makes driving comfier. First of all, the tint makes your car cooler in the heat of the summer, and additionally, it reduces the glare you get from the side and rear windows. However, even though it seems like getting some tinted foil for your windows shouldn’t be hard, there’s more to making the right choice than you would think at first glance.
We will show you our favorites in our window tint reviews, and guide you through everything you need to know about making the right choice.
See The Quick Comparison Chart
Benefits of Window Tints
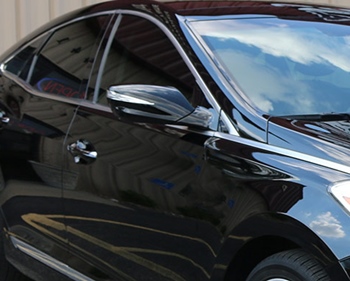 There are many reasons why you would want to install windows tint on your car. They look great, keep your car cool, and help protect the inside of your vehicle in more ways than one. But if you’re still not sure whether it’s worth the hassle, let’s go through the different benefits you get when you install a car window tint.
1. Stay Cool
We all know that situation – you’re out in the town running errands, with your car parked on a wide, open-air parking lot. Everything seems fine, but when you step into your vehicle, you’re instantly overwhelmed by the sweltering heat. You can’t sit on your upholstery without getting stuck to it, and it seems dangerous even to attempt to touch the dashboard or your steering wheel, especially if you don’t have a heat-absorbing best steering wheel cover. It’s terrible, and it happens every summer.
One of the most noticeable effects of window tint is definitely the temperature of your driver’s cabin in the summer. Even when it’s not scorching outside, your car can get hot very quickly if it’s parked directly in the sun. Car window glass doesn’t really do a great job insulating in those circumstances. But when you have a tinted layer on there, most of the sun’s rays get reflected, instead of piercing right onto your seat. With a good set of window tints and a top-rated windshield sun shade, you can keep your car a pleasantly cool temperature even when you’re parked directly in the sun.
2. UV Protection
Along with the sun’s rays, window tint reflects the harmful ultraviolet rays. This natural component of the sun’s radiation can be very harmful to both you and the insides of your vehicle.
UV rays are responsible for most of the color fading and brittleness that happens to plastic. Your entire dashboard, but also the door and seat components, deteriorate and degrade over time under the exposure of UV rays. Plastic loses its flexibility and color, and after enough exposure, starts to break very easily. UV rays can also damage any type of upholstery, but vinyl and nylon upholstery have it worst. These common types of upholstery material start to break and crack under heavy exposure to UV rays. When you invest in a set of window tints, you help the insides of your car stay in great condition for a long time. You improve the durability, and the overall performance of your entire car cabin when you get rid of some of the UV rays your car endures on a daily basis.
On the other hand, you want to protect yourself and your passengers as well. UV rays can cause a plethora of health issues, the worst of which is skin cancer. If you don’t use sunscreen whenever you go out, you should at least have your car windows tinted to reduce exposure.
3. Glare Control
Sun glare can be a huge problem if you’re on a long drive during the day. This problem is made worse if you have astigmatism or wear eyeglasses without an anti-reflective coat. Glare can be a big distraction and a liability on the road. Window tint can help reduce, and even completely get rid of the glare caused by your side and rear window. In other words, you can greatly reduce eye strain and fatigue if you add a bit of tint to your windows.
4. More Privacy
Finally, one of the benefits of window tint that most people find important is that you simply get more privacy in your own vehicle. You shouldn’t need to worry about what you wear and what you do inside your own car.
But also, you no longer need to hide your valuables when leaving your car. Your laptop, wallet, or phone can attract a lot of unwanted attention to your car, especially if you don’t have a noticeable car alarm system. Thieves are attracted to things kept inside cars, but there’s no reason to go hiding your stuff whenever you need to park – get your windows tinted and nobody will notice the valuables you have on your car seat.
Best Window Tints Comparison Chart
| PRODUCT | DETAILS | ||
|---|---|---|---|
 | Gila Xtreme Limo Black 2.5% VLT Automotive Window Tint |
| View On Amazon |
 | Gila Heat Shield 20% VLT Automotive Window Tint |
| View On Amazon |
 | Auto Expressions 5044535 Charcoal Grey Film Static Cling |
| View On Amazon |
 | Install Proz Double Ply Window Film (36″ x 100′) (20% Tint) |
| View On Amazon |
 | MotoShield Pro Precut Ceramic Tint Film |
| View On Amazon |
 | PROTINT WINDOWS Window Tint Film Roll |
| View On Amazon |
 | LEXEN 2Ply Economic Premium Carbon 20″ X 100FT Roll Window Tint Film Auto Car |
| View On Amazon |
Best Window Tint Reviews
1. Gila Xtreme Limo Black 2.5% VLT Automotive Window Tint
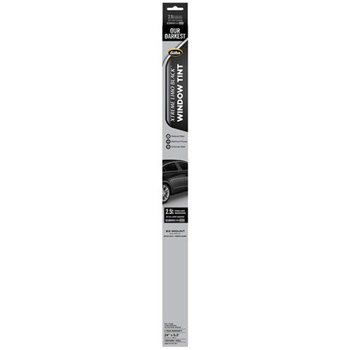
 Gila is the manufacturer of one of our favorite window tints on the market. The Xtreme Limo Black provides exactly what the name suggests – the extremely dark tint that’s popular in limousine cars. At 2.5% VLT, this tint lets just enough light not to leave your car cabin pitch black. When you take a look at the outside of a tinted window, it’s hard to even barely make out shapes, so this tint provides a lot of privacy. However, from the inside, it’s possible to see the outside. Sadly, from the inside, you can notice a slight blue hue of the product. A single roll of the product is 24 inches x 78 inches. That size lets you do one rear window or two side windows. So, if you plan on covering your entire car, you should get at least 3 rolls of the tint. Another drawback is that the tint is held in a roll with a rather large sticker, which can leave an adhesive residue, making around 8 inches of the film unusable. Overall, this is a great, economical option that can work in any car, if your state allows 2.5% tint.
Pros
- Rather affordable
- Provides complete privacy with 2.5% VLT
Cons
- It has a bit of a blue hue
- The sticker holding it together can ruin about 8 inches of the product
2. Gila Heat Shield 20% VLT Automotive Window Tint
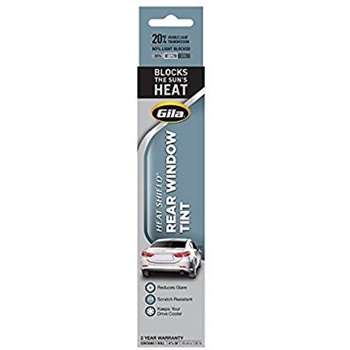
 The popular Gila makes our next pick. This time, we chose their Rear Window tint with high infrared protection. That means that the tint won’t allow a lot of sun’s heat to pass through, helping your car stay cool even during summer months. This tint comes in a unique format which makes it very easy to apply to any rear window. It comes in long, narrow strips, which are easy to apply, and also makes it easier to work the air bubbles out with a squeegee. However, the long strips can be somewhat tricky to line up perfectly, so you may end up with some of them overlapping, or worse, a bit of a gap between the strips. The strips are 6 inches wide, and a total of 318 inches (or 26 feet) long. The rear window strip comes with the VLT rating of 20%, which is legal for rear windows in most states. You can also get a 5% VLT tint from the same manufacturer, but the other options don’t come in the handy strip format.
Pros
- Comes in long, narrow strips for easier application
- Offers good heat protection
Cons
- The strips can be difficult to line up
3. Auto Expressions 5044535 Charcoal Grey Film Static Cling
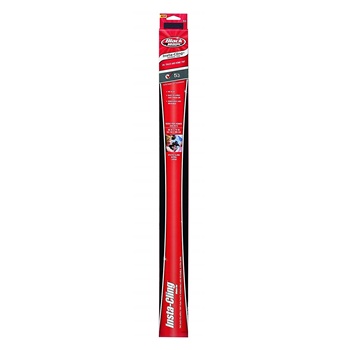
 Our next pick is called Black Magic, and it’s sold by Auto Expressions. This is an adhesive-free window tint that clings onto your window with the power of statics. That makes this product extremely easy to install, remove, and re-use. If you’d prefer a hassle-free installation, we recommend this product with static cling technology. You can choose among two options when it comes to the VLT rating of this easy-to-use tint: you can opt for the very dark 5% VLT, or a somewhat brighter 20% VLT. Check your state laws to ensure such low VLT is allowed on regular cars. This product comes in a roll, and its total dimensions are 26 x 78 inches. This is enough to cover two side windows or your rear window, so you may need to get several rolls to cover all of the windows you want. This window tint has one metalized layer, which is great at reducing the heat that enters your vehicle. Sadly, metalized tints can also cause slight interference with mobile phone signals. If you generally don’t have a stable network in your car or area, we don’t recommend this product. However, if you never experienced issues with the signal, this product shouldn’t make much of a difference for you.
Pros
- The static cling tint doesn’t use any adhesive
- Easy to apply, remove, and re-use
Cons
- Metalized tint may interfere with phone signal
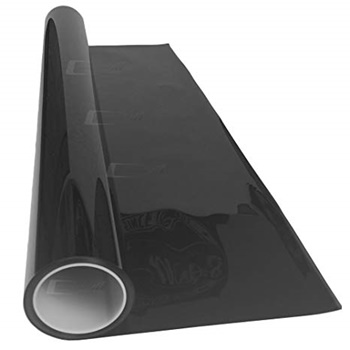
4. Install Proz Double Ply Window Film (36″ x 100′) (20% Tint)
 Our next pick is one of the more expensive, high-quality tints with many great reviews. It’s made by Install Proz, and it’s a great choice if you’re looking for a durable solution. This tint is a double-ply solution with dye, and the material seems rather solid. It’s reasonably easy to install, especially given the fact that the material doesn’t crumple or fold too much. This tint comes in a variety of VLT percentages, so the company makes it easy for you to comply with your state laws. You can choose any of the options including the very dark 5%, the lighter 20%, the widely used 35%, and the rather bright 50% VLT. Even the higher visibility tints provide quite a lot of privacy. That’s because it highly obscures the shapes when you look from the outside, but lets you see rather well from the inside. The color of this tint is charcoal, so it won’t give a blue or purple tint to the insides of your car. You can get a single roll, sized 36 x 1200 inches (100 feet). This gives you enough room to cover windows of around 4 standard sedan vehicles, or to make and fix numerous mistakes during installation – that’s why we recommend this option to DIY tinting rookies and first-timers.
Pros
- Very large roll of 36 x 1200 inches
- High-quality materials
Cons
- Quite expensive
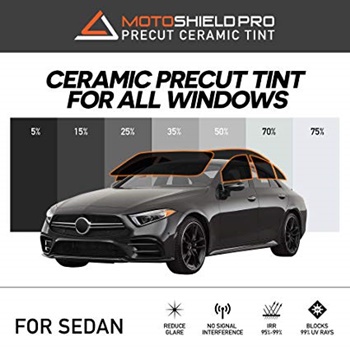
5. MotoShield Pro Precut Ceramic Tint Film
 Our next pick is a great choice for those who would like to spend as little time as possible on installing tint. That’s because MotoShield Pro creates a high-quality tint, pre-cut to size for sedan vehicles. All you need to do is enter the information about your vehicle (the model, year, and make), and choose the VLT value you want your tint to be, and the company will cut the tint to the exact sizes you need for all of your side windows, vent and quarter windows, and front and rear windshield. Having a pre-cut tint will make your installation much faster and simpler, but you should be careful during installation because there’s little room for error. There’s another great advantage of this product – it’s ceramic tint. The nano-ceramic layer is responsible for the extraordinary UV and heat protection this tint provides. When it comes to VLT, the company lets you order separate VLT levels for different windows, so you can, for example, have 5% on the rear, 15% on the backseat sides, and 35% on your driver and passenger side windows.
Pros
- Ceramic tint is great for UV and heat protection
- Pre-cut to the dimensions of your car windows
- You can order elements with varying VLT levels
Cons
- Pre-cut tint doesn’t leave room for error during installation
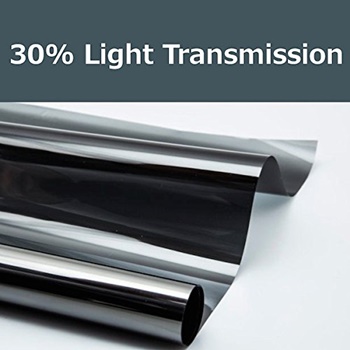
6. PROTINT WINDOWS Window Tint Film Roll
 The next product on our list is a great pick for anyone who is looking for a good quality economy option. This simple, dyed polyester tint by Protint Windows is affordable, and it does its job properly. This product comes in a roll with dimensions of 24 x 120 inches (10 feet). For a typical sedan vehicle, this should be enough for either two or three side windows. So, choose which windows you want to tint and measure them to determine whether you need two or three rolls for your entire car. Beware that some customers complained that the rolls they ordered came with a slightly different color hue. Your installation will be a bit easier with the gift squeegee you get from the manufacturer. Sadly, the film is prone to bending and crumpling, so get an aide to help you install it stress-free. When it comes to the VLT rating, this product comes with a wide range of options. You can go as dark as 5%, or lighter with 20, 30, 35, 40, 45, or 50% VLT. Overall, this tint is a good choice if you need an affordable product.
Pros
- Very affordable
- Comes with a free squeegee for easier installation
Cons
- Rolls can come in different color hues
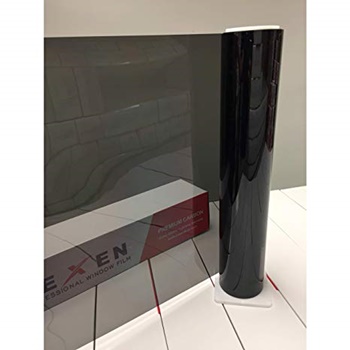
7. LEXEN 2Ply Economic Premium Carbon 20″ X 100FT Roll Window Tint Film Auto Car
 Our next pick is a carbon auto tint that is made by Lexen. Though this product comes at a mid-range price, you get a very large roll of the product that you can use to tint 3 standard sedan vehicles. The dimensions of this product are 20 x 1200 inches (100 feet long), which is a rather large roll. However, make sure that the 20-inch-wide tint works for your car. Overlapping and lining are possible but rather hard to do. That’s especially true for this product, as it’s rather thin, making it hard to work with. It crumples easily, so you need to be careful when installing it. However, if you have someone to help you, the installation will be a breeze. The manufacturer offers many VLT options. From the darkest 5%, over 15, 20, 35, and finally the 50% VLT rating, you can choose exactly how much light you want in your cabin. Being that this is a carbon-based product, it can last for a long time without discoloration. It also blocks almost all UV rays, so this is a great choice if you’re looking to protect yourself, your passengers, and your plastics from the adverse effects of the sun.
Pros
- Great value for the money
- Carbon-based tint with 99% UV protection
Cons
- It’s thin and crumbles easily
Types of Window Tints
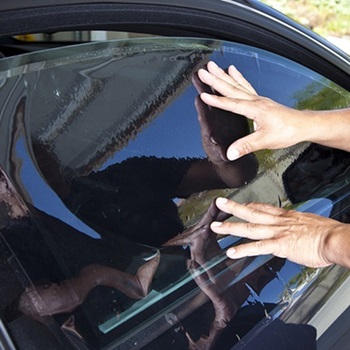 Sadly, picking a window tint is not as simple as it may seem. First of all, you should choose the exact type of tint you want to get. There are two ways to categorize tint – according to the cut and the material. Let’s go through the properties of each type of tint so you can have a better picture of what’s available.
1. Pre-cut or In A Roll
The first way to classify window tint is by the cut. You can get pre-cut tint tailored for the model of your car, or you can get an entire roll of tint to measure and cut on your own.
1.1. Pre-cut film
You can get a tinted film for car windows pre-cut to size. Usually, you have to specify your car manufacturer, model, and year, and the shop will either cut the tint to the dimensions of your car’s windows or get a pre-cut product shipped to you. The result is the same – you get the tint film already cut and trimmed to the exact dimensions of your windows. This sounds amazing, but there is one big downside to this method. You don’t get any spare tint with the cutouts. That means that there are no second chances when it comes to installation. If you don’t get the installation right the first time, you’re forced to get a new set of pre-cut tints.
1.2. Rolled film
On the other hand, the more popular way of getting window tint is purchasing an entire roll of the product. With a roll, you don’t need to worry about making mistakes – you get all the material you need and then some. However, you need to measure and cut the film yourself, which makes the installation more difficult and time-consuming. Still, with enough material to go around, you don’t need to fret every step of the way.
2. Tint Material
No matter if you get your tint pre-cut or you opt for the whole roll of foil, you will also need to choose the particular type of material the foil is made of. Let’s take a look at different options.
2.1. Dyed film
The most popular type of window tint is by far dyed film. These films are usually made out of polyester, and they are dyed in different ways. Since polyester itself can be quite difficult to infuse with dye which can last for a long time and sustain considerable damage, the so-called deep-dyed polyester films can be quite rare and expensive. On the other hand, most dyed films are made out of three layers – an outer layer of clear polyester, and an inner layer with semi-transparent color, and an adhesive layer that sticks to your window. This type of dyed film is very inexpensive, and most people can afford to get a large roll of dyed window tint for their cars. Dyed film tint looks good, and it’s easy to install. However, its protective performance is not the best available – the material provides the least UV and heat protection compared to other materials. In fact, the material isn’t entirely resistant to exposure to UV rays itself. Sometimes, black dyed film tint turns purple after a while, under the influence of UV rays.
2.2. Carbon film
The carbon film is similar to the dyed film, with a couple of differences. Just like the dyed film technology, carbon films are made with layers of polyester around a colored layer. Within that layer are nano-particles of carbon, which give a fairly dark color. Darkest window tints are often made this way. The carbon particles are supported with dyes, pigments, and fillers. Apart from the manufacturing price, the additional substances are used, especially because the carbon particles actually give a brown color, which is modified and supplemented to become pure black. When it comes to protective capabilities and performances, a carbon film is more resistant to the sun’s energy. Not only will it resist color changes, but it can also successfully protect the insides of your car from deteriorating under the influence of UV rays. You can also expect a significantly lower cabin temperature in the summer. However, carbon films can appear a bit hazy under certain angles, because of the way carbon particles reflect light.
2.3. Ceramic film
Ceramic window tints are the newest item on the market, so they’re not so widespread, but they are a promising technology of auto window tinting. Essentially, a ceramic coating is added to either a dyed or a carbon polyester sheet. The nano-ceramic coating does not have a color of its own, so it’s used as an addition to existing tinting technologies. Because of that, whether the tint will fade over time or not mostly depends on the type of black pigment used. The ceramic material offers great performance when it comes to blocking infrared radiation – the source of the sun’s warmth. A ceramic-coated carbon film offers amazing performances in blocking both UV rays and the sun’s heat, making them the best choice for those who live in very hot climates. However, due to the fact that this technology is not yet very widespread, a ceramic film can be significantly costlier than the alternatives.
2.4. Metallic film
Metallic tints typically come in four layers: an adhesive layer, UV blocking coating, the metallic layer which is responsible for light reflection, and a clear outer layer. The metallic films offer great performances when it comes to glare reduction, and UV and heat blocking. Additionally, this type of tint is quite durable, and it doesn’t fade over time. However, the biggest downside of a metallic tint is that the particles of metal interfere with radio waves and signals such as the cell network and GPS. That’s why this type of tint becomes less popular by the day.
2.5. Factory tint
Finally, some cars come with pre-tinted windows. This tinting is done in the factory, and this is the only type of tint that is not removable. The process factories use to tint windows is called deep dipping. It gives rather good darkening results that don’t fade but deep dipped windows don’t offer a significant UV or heat protection. As you can imagine, it’s not possible to get your windows tinted this way after the car is already assembled. However, you can add additional tint film to your windows. Make sure to calculate the sum result of visible light transmission (VLT), taking into account both the original tint of your windows and the film!
Window Tint Buying Guide
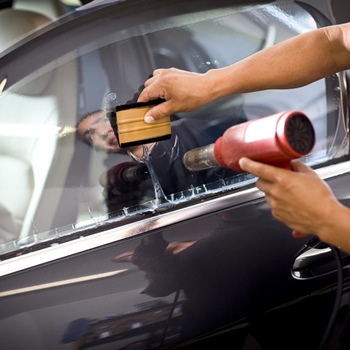 Now that you know more about the various types of window tints, you probably already feel more confident when it comes to choosing the ideal kind of tint. However, aside from the different materials and cuts, there are other things you should be on the lookout for. Let’s cover some of the most important factors to consider before making your final pick.
1. Sunlight Protection
Of course, one of the main reasons why people get their windows tinted is protecting themselves, their passengers, and the components of their cars from the adverse effects of sunlight. Many people drive or stay parked in the sun for hours on end, which can result in extreme heat inside the car, and excessive exposure to surface damaging UV rays. And really, when we talk about the radiation of the sun, we actually talk about three kinds of radiation – Ultraviolet (UV), visible light, and infrared (IR).
1.1. UV radiation block
Ultraviolet radiation is a part of the spectrum of radiation that the sun emits non-stop. This low-frequency radiation is powerful ionizing radiation, which means that it has the capability to damage the DNA cells – our genes. UV rays can’t pierce very deeply, so they mainly cause issues in people’s skin. Prolonged exposure to UV rays can cause premature skin aging, but also incurable diseases like skin cancer. On the other hand, UV rays also affect polymers, so all kinds of plastics are susceptible to damage. If left unprotected, the color of your dashboard and faux leather upholstery fades, and over time the materials become brittle and fragile.
As you can imagine, protecting yourself and the components of your car cabin is of utmost importance, especially if you live in very sunny areas. That’s why you should look for a window tint that blocks a high percentage of UV rays from getting inside. Carbon-based window tints are generally the most successful at warding off UV, while dyed polyester tints don’t generally do an amazing job. Make sure to check the amount of UV protection when getting ceramic or metallic films as well, as there is a variety of protection percentages among these types of tint.
1.2. Visible light and the VLT level
The visible light is the part of the sunlight spectrum that we all know and love. Visible light doesn’t have any notable negative effects on your health or the condition of your car, but it can be a hurdle while driving. This part of the spectrum is responsible for the glare you get when driving on a sunny day, especially in the mornings and evenings. People who have astigmatism or wear glasses without an anti-reflective coating have a particularly hard time dealing with the issue of glare. This problem is one of the causes of road accidents, so getting rid of sunlight glare can help you feel more confident and safer while driving.
The VLT level is one of the most important features to consider when getting window tint. The abbreviation stands for Visible Light Transmission, and essentially, it indicates the amount of light that is allowed through the tinted window. VLT is presented in percentages, and the lower the number, the less light can enter the vehicle. So, for example, a window tint with a VLT rating of 25% lets only one-fourth of the light from the outside enter the car. All kinds of window tints come in various VLT levels, so the material doesn’t make much of a difference.
The ideal VLT level really depends on your own preferences. However, each country and state has its own regulation for the minimum VLT percentage for each car window. We will cover the legal regulations regarding VLT in the following Window Tinting Laws section.
1.3. Infrared radiation protection
The infrared part of the sunlight spectrum is, in simple terms, heat. When sunlight goes through your car window, the longer wavelengths of the rays cause the cabin of your car to warm up. In the summer, this can become unbearable in the warmer areas of the country. So, what can you do? Of course, you should look to park in the shade or inside a garage as often as possible. But when you can’t, a good choice of window tints can help.
Ceramic film tints are the most successful at warding off the infrared part of the sunlight spectrum. If you’re considering another kind of window tint, check the product description to see if the tint blocks heat.
2. DIY Application
Installing window tint all by yourself is not an easy task, and you will need a bit of patience and persistence to get it right. If you’re not confident in your DIY skills, you may want to consider getting the professional installation done to save yourself some trouble. However, even though it seems very complicated in the beginning, installing window tint is not as difficult once you get started.
When getting window tint for yourself, you can either get an entire roll or get the tint pre-cut to dimension for your car model’s windows. Both of these have pros and cons when it comes to the ease of installation. The roll gives you room for mistakes, as you get more material, but it also requires you to cut the material yourself. On the other hand, getting pre-cut tint lets you avoid the hassle of measuring and cutting, but it doesn’t leave any room for error during application – if a piece gets crumpled, torn, or bursts, you need to purchase a new set.
How to Install Window Tint?
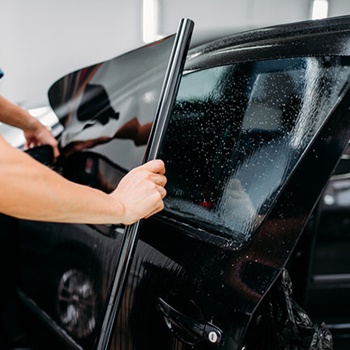 Installing window tint can be a tricky task, but it’s not complex. The job does require some persistence, but also a lot of patience. If you don’t have the time or the persistence for detail work, we’d recommend taking a little extra to pay for a professional service. On the other hand, if you’re looking forward to DIY-ing your way around some sticky foil, tint installation will be a breeze.
In these directions, we will focus on explaining how to install tint from a roll, so our instructions will include measuring and cutting to window dimensions. If you opt for a set of pre-cut tints, your installation will be simpler, and you only need to follow the latter part of the directions.
1. Before You Start Car Window Tinting
Before you can apply your tint, you need to pre-condition your car windows and prepare everything you need for the installation to go smoothly.
1.1. Preparation
- Thoroughly wash your windows inside and out. Don’t use ammonia-based cleaners like Windex, because these can make your tint turn purple. Instead, you can use a bit of dish soap, or any specialized car wash soap. When cleaning your windows, roll them up and down to get all of the edges and the lower part as well. Use a squeegee to get all of the water off your windows. Let your windows dry thoroughly.
- You can clean your windows with a razor blade, but you should be careful when doing this. Don’t scrape your rear window with a razor blade if it has any defroster or antenna lines. On the other hand, if you have factory tinted windows, be careful not to scratch or damage the tint.
- If you have an old tint that needs removing, you can do it with a fabric steamer. Use steam to soften the adhesive, peel the tint off, and wash your windows.
- Park your car in a dust-free area. Ideally, park in a garage. If you’re working outside, pick a day with no wind which can bring dust and dirt particles onto your window or sticky tint backing.
- Leave your car on while you’re working, because you’ll need to roll the windows up and down frequently.
1.2. What you need
- Spray bottle with soapy water
- Spray bottle with clean water
- Squeegee
- Hard Edge or a thin ruler
- Microfiber or another low-lint cloth
- Precision knife
If you don’t have these at hand, you can get one of the many toolsets which include everything you need for tint installation.
2. Measuring and Cutting
Roll your windows up, so you can get an accurate measurement.
Determine the sides of your tint – it should have a peel-off layer that keeps the sticky side protected. Typically, this layer has some sort of print on it. Find this side, and keep it facing you as you work. The tint is applied from the inner side of the window, so the sticky side should face outside. Don’t peel the protective layer off during this step.
2.1. Lay it on the window
Spray the outside of your window with a bit of water (soapy or otherwise). Lay the tint over the outside of the window, sticky side facing you. It should stick to the wet window, but you should also be able to slide it over it.
When laying your tint, ensure it covers the whole window, and leave around 3 inches over the edges. Cut the piece from the roll, with a couple of extra inches in every direction.
Now, with your piece of tint stable on the outside of your window, spray the tint itself with water. You should spray the exposed side, which is currently the peel-off layer.
2.2. Measure and cut
Pressing the tint in place with your hand, trace two of the straight edges of your windows with a knife. If you’re working on your driver side window, you should cut the bottom and the right edge. Pull the film towards the side edge, leaving around 1 inch of spare tint.
Now, you can cut the other edge as well, still leaving the top untrimmed. Once you cut the other side edge, center the piece of tint, so that you have about half an inch extra on each side. Pull the tint down as well, around 2 inches, so that the tint goes lower than the window. You want to have your tint tucked and reaching every edge of the door. It should cover the entire window even when it’s rolled all the way up.
Once you’ve pulled the tint down, it’s time to cut the upper edge as well. Roll your window down a bit, and trace the top of the window with your knife. Re-center the tint. You should have around half an inch extra in every direction.
2.3. Adapting to curvature
You may notice that it doesn’t exactly follow the window curvature very well. If this is the case, you can use a heat gun to shrink the plastic on the upper and lower ends, to make it a better fit for your window.
Do this while the tint is still stuck on the outer side of the window. Ideally, adapt the tint to curvature before you cut it to exact size.
Spread the tint over the window as well as possible, and spray it with soapy water. You will be shrinking the uppermost, and possibly the lower part of the tint. Try the lowest heat setting first, and rise the temperature if the tint doesn’t shrink when you get the heat gun close. You can use either a microfiber towel or a flat hard-plastic card to mold the tint to shape.
3. Sticking
Prepare the inner side of your window. It’s extremely important that your window is perfectly clean, so wash it a couple of times. You can also use a razor blade to scrape away all imperfections. Then, spray the window with a bit of soapy water.
Peel off the protective layer, but don’t completely remove it. Peel around a half off, with the other half in place. Spray the exposed adhesive with a bit of clean water – don’t use soapy water for this step.
Roll your window down slightly. Line up the upper edges of the tint and the inner side of your window. The water will make it slide, so you don’t need to worry about getting ti perfectly right straight away.
Once your upper edge is lined up, use both of your hands to work the tint sideways. You need to get it under the rubber seal that keeps the window in place.
Use a squeegee to work the water out. Push the water to the sides, and not towards the lower part of the tint, which is still waiting to be installed.
Roll your window up, spray the window with water, and repeat the same steps to get the lower part of the window tinted. Pull the peel-off layer down, and spray the sticky side of the tint with water to prevent it from getting stuck right away.
Tuck the lower part of the tint inside the bottom seal. You can use a hard edge or a thin ruler to do this.
Remove all water air bubbles with a squeegee until the tint lays perfectly over your window. If you fear the squeegee will rip or scratch the tint, spray the tint with water.
Your tint should be properly applied and stuck now.
Window Tinting Laws
 Along with most components of your car, your windows are strictly regulated by the state issuing your registration and license. Different states allow varying levels of VLT (visible light transmission) on different windows of your car. That’s why it’s important to check the particular laws applicable in your state before you purchase the window tint you want – it may not be legal to use.
You can check the details per state on this website about window tint laws.
1. Which Windows to Cover
While every state has its own unique regulations, there are some common rules when it comes to the position of window tint on your car.
1.1. The windshield
In general, tinting the windshield is not allowed. Some states make an exception for a few inches off the top of the glass. For example, Alabama and Oregon permit as much as 6 inches of tinted film off the top, while Michigan, Colorado, and California allow up to 4 inches from the top of the windshield. Many states, such as Arizona, Florida, Montana, and South Dakota use the AS1 line to determine windshield tint legality. The AS1 line is present on most cars, and you can notice it if you take a closer look at the top of your windshield.
1.2. Rear and side windows
On the other hand, most states permit tint on the rear and all side windows. The main difference among these is in the regulations for the minimum VLT percentage. However, New Hampshire and New Jersey do not allow front window tints at all. All states allow backseat side window tint.
When it comes to the rear window, most states allow it, with some, like New York, Nevada, and Maine not even regulating the VLT percentage. However, all states which allow rear window tinting requires functional side mirrors.
2. Visible Light Transmission Levels
The percentage of VLT, which can be easily found on any window tint label, is the most important factor when it comes to the legality of tint. However, factory tinted windows can create a slight complication as the states regulate total tint, and not only the tint of the applied film.
So, if your tint film lets 50% of the light through, and your car came with the windows tinted to allow 80% of the light in, you need to calculate the total light which is allowed through. To do this, you should multiply the window tint percentages. Here’s how it looks: (0.50 × 0.80) ×100 = 40%
Check your car manufacturer’s website, or even better, your user manual to see whether your vehicle has factory tinted windows and to find out the VLT percentage.
FAQ About Window Tints
1. How durable is a typical window tint?
It’s not easy to give an estimate on how long a window tint will last. This mostly depends on the type of the tint, but also exposure to the sun, and potential scratching damage. However, if you get a normal quality window tint, you can expect at least a couple of years of service from a single set. And if you decide to invest in a higher-quality ceramics set, you may get as much as ten years of use out of them.
2. When should I replace my window tint?
Window tint does not have a set expiry date, so this question doesn’t have a definitive answer. In general, this depends on the quality and the resilience of the tint you opt for, but also on your own preferences and tolerance. For example, some people may decide to replace their tint as soon as they see a scratch, while others don’t mind scratches and even discolorations that much. However, if you opt for a dyed tint, the pigment inside of it will deteriorate, and turn purple over time. This happens with carbon film as well, due to the fact that these also have similar dye fillers. But with carbon, this doesn’t happen as quickly as it does with the pure dyed polyester. Higher quality tints are less prone to discoloration and scratches, so if you’d prefer to have your window tint stay intact for a decade or so, you will benefit from investing in a set of high-quality tints.
3. How do I wash my tinted windows?
Most of the time, when we wash our cars, we wash the windows only from the outside. However, just like you should occasionally use some clean your upholstery, you should wash the inner side of your windows as well. This is especially true if you have children who like to touch the glass with sticky fingers.
You can use a mild solution of any car wash soap or even dish soap to clean your windows (we wouldn’t recommend dish soap for other parts of your car, though). Don’t use sharp objects or a pressure washer to wash your windows from the inside. Simply spray some soapy water, use the soft side of a sponge or a soft microfiber cloth, scrub if there are places with stains or stuck-on debris, and rinse with clean water. Be gentle when you wash your window, as you don’t want to end up scratching your tint.
Wrap Up
There are many reasons why you may want to install window tint to your car. Maybe you want to get a bit more privacy inside your car, you have problems with glare while driving, or perhaps you want to protect the insides of your car (and yourself) from the sun’s harmful UV rays. Or, after all, you simply really like how cool cars with tinted glass look. Whichever the reason, getting your windows tinted will bring you many benefits for a small price, so there’s really no reason not to do it. But if you want to get a high-quality tint that will last for a long time, you need to take some time to find the best window tints for your vehicle.
We hope our windows tint reviews and buying guide helped you do just that – find the right solution for yourself.
See also: top-rated windshield washer fluids