If you asked an average driver about the best way to make a used car feel new, the most common answer you’d get would be – car detailing. Truth be told, a lot of people do not quite understand what car detailing actually includes, but I see that as normal. The sole essence of the process changes every once in a while, due to various reasons (i.e. better cleaning technology).
I would like to invite you to this car detailing summary I made throughout the years. Every car owner out there does things differently to a degree, but some cleaning tasks are mandatory if you want to get the best out of your car’s look and feel. I never insist on doing all these things the way I do. Instead, I’d like to show you the basics and help you make your own list of car cleaning priorities. Let’s begin!
What Exactly Is Car Detailing?
 Everyone has at least been confused by this term – car detailing. If you go to a car wash, do you ask for a detailing if you want them to cover everything? Or is any car washing or cleaning activity considered to be “car detailing”? What if I told you that nobody knows what car detailing is exactly?
Jokes aside, car detailing can practically be whichever cleaning activity you choose and commit to. But there are some standards that professional detailers uphold, so naturally, all drivers gravitate towards them, myself included.
You can’t just run a microfiber cloth against the car’s surface and call it detailing. I mean you can, but you’d be wrong. Let’s go through the basics and all the nuances these cleaning techniques bring along.
The Nuances of Car Detailing
Every car is essentially the same, or extremely similar when it comes to the main parts and the parts that need to be cleaned. Usually, the main focus is on surfaces and materials that get a lot of contact time. For example – the car’s insides get a lot of skin contact and a lot of “touch time” with everything you are hauling with you. The car’s exterior, on the other hand, makes contact with, well, the world and it needs to be dealt with accordingly. You can’t polish the paint with a vacuum cleaner, and you can’t clean the dashboard with a pressure washer.
For the sake of simplicity, it is always good to separate the interior from the exterior detailing.
1. Exterior
When we say exterior detailing, the first thing that comes to mind is car washing. While that is one of the messiest car detailing activities, it’s important to note that there’s more detailing stuff to do after washing.
1.1. Car Washing
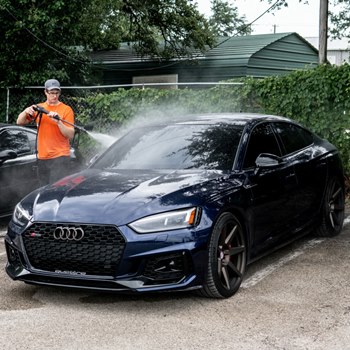
First and foremost, you need to get the nastiest stuff off your car. No matter which method you opt for (manual or pressure washer), you need to put some muscle into it. If you want to detail your car, a quick wash just won’t do because later on, you will have to commit to polishing and waxing. There is nothing more tedious than trying to polish a badly-washed car. Keep it simple:
- Wash from the top of the roof down to the wheels
- Use a two-bucket method
- Get your hands on some good car wash soap
1.2. Buffing, polishing, and waxing
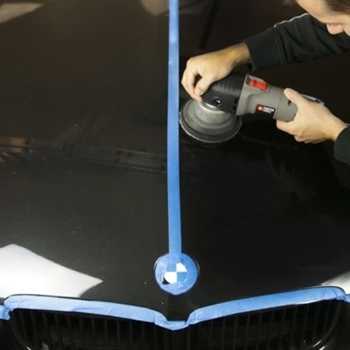
After the car is squeaky clean, it is time to put some shine on the old coat of paint. This part requires you to inspect the car and see whether or not it’s time to remove swirls and scratches. If your car’s paint is prone to scratching, please avoid automated car washes. They are notorious for their harsh contact with the car’s surface.
So, get your buffer ready, and prepare the polish liquid, given that you already marked the critical spots. Depending on the severity of the swirl and scratch marks, polishing can take up to several hours. But, if you are fighting the usual swirls, 30 minutes will do the trick.
If you notice some paint damage, the chances are you will be able to get rid of it with the iron remover or a clay bar. Either way, the car’s surface must be free of these stains before you start polishing it.
1.3. Wheels and windows
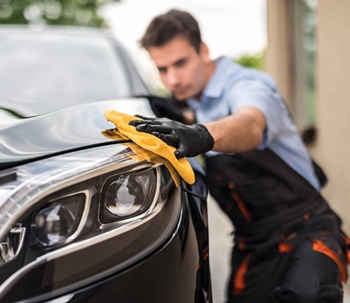
You’d be surprised by the number of people that forget this crucial step. Washing away the windshield with the hose will give you dull results. Use a proper chemical, a microfiber cloth, and some elbow grease to really put that reflective shine onto that windshield. The same thing goes for all the other windows.
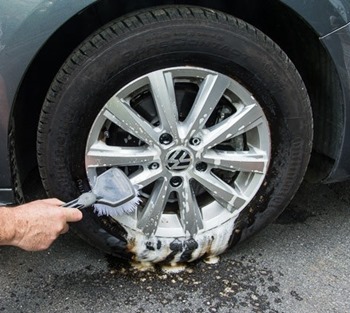
Detailing the wheels serves another purpose, besides the bling of course. You get to inspect your wheels and tires up close. Are the tires worn out? Do you have to change your summer ones into a set of all-season tires? Are all the tires equally inflated? If not, why? These are all the little questions you get to answer while cleaning the wheel discs.
1.4. Plastic trim
Lastly, do not forget the plastic trim. In truth, these parts are one of the easiest to clean and detail, and most of this job will be done during the car wash. However, if you wax your car often (4 times a year is the average), you should consider going the extra mile.
The thing is, this plastic is quite porous, and you know what that means – wax gets stuck inside. However, the solution is simple – get a pencil eraser and scrub down the excess wax and everything you find on the plastic trim. Just be careful not to damage the paint job if you go over the plastic surface – rubber can do that. You can always stick some tape around the trim just to make sure.
2. Interior
 Cleaning and detailing the interior of your car does not cause the awe on the street because no one can see how polished the dashboard is or how clean the seats are. However, the feeling of a freshly detailed car interior is invaluable. Your drives will be comfier and smoother, that I guarantee!
2.1. Vacuum first
Let’s say that by this stage you have already taken out the trash from your car. Over the months, a lot of stuff can accumulate in your car, especially if you are not the only one riding (in) it. So, after the waste is gone, get your vacuum cleaner and go over everything accessible. I understand that the car’s interior isn’t exactly easy to vacuum, but an extra minute or two should do it.
Also, don’t forget to vacuum the AC vents. You can even use a slim brush to get inside and get all the dust buildup out, right into the vacuum. Needless to say, turn the AC off while doing this.
2.2. Clean the essentials
When I say the essential, basically I mean everything except for the windows and the upholstery. Get a microfiber cloth or two, some alcohol-based cleaning solution, and start rubbing. You can even clean the leather surfaces with a cloth, as long as you remember to use the appropriate agent. Alcohol-based chemicals are not that good on leather, and some may even damage it.
So, here’s a “remember to clean” list:
- The steering wheel
- The dashboard and the trimming above it
- The pedals and the stick
- Clean the glove compartment and all other holders if your car has them
- The control board and the music player
2.3. Carpeting and upholstery
The biggest task when detailing the interior of your car is the upholstery. The seats make the most contact with our bodies, and our feet touch the carpeting all the time while we are inside the car. So, since there is so much foot traffic inside your car, there is more to it than just visuals – you must take care of the smell.
Sweat, food, crumbs, pet waste, mud and dust, you name it. Everything must go. A trustworthy car upholstery cleaner will make everything easier, but you must take some extra time to inspect every nook and cranny of your car’s interior during this step.
2.4. Clean the windows from the inside as well
Lastly, the windows need a cleaning from the inside as well. Most commonly, you can use the same chemical solution that helped you clean the glass from the outside. However, be prepared for sturdier stains, since you didn’t get the chance to hose the nasty stuff off. Also, cleaning vertical surfaces in small spaces by hand is no fun. Your range of motion will be limited, and you will get tired, which is normal.
If you are not sure about the material your doors are made of on the inside, be extra cautious around the edges of the windows. Some chemicals can cause damage to the material around the glass.
How to Approach Car Detailing?
 Not to sound repetitive, but I really think that every driver needs to go through the process of car detailing at least once a year. You get to meet your car’s upsides and downsides. Also, I’m sure you’ve noticed that almost every detailing step requires some sort of inspection to take place.
1. By Yourself
If you are new to this, and your car isn’t exactly clean, this whole detailing ordeal may take up the most of your day. There’s preparation and there’s the act of cleaning. Detailing the car by yourself will help you get to know your vehicle better, and it will cost less. Although the price of all the cleaning gear adds up, you get to use the same stuff again, so in the long run – it pays off.
The downsides of car detailing on your own are there as well. For example, you will always need more time than a professional to do the whole detailing. Also, there is the issue of pricing. Car detailing can cost up to several hundreds of dollars, depending on the car model, of course.
2. Hire a Professional
If you do not want to go through all the hassle of cleaning and detailing, leave it to a car detailing shop. People that work there have experience with all sorts of vehicles, ranging across all sorts of messiness. It will cost you more, but you won’t have to learn a thing, and there is no time wasted.
I resort to professional car detailing only when I can’t make the time to do it myself. I learned a lot about each of my cars through detailing. A lot of car owners can testify that detailing your own car has something special to it.
A Few Tips and Trick for The Road
Before you go, I’d like to share a few practical things, even though I covered them in my other articles.
1. Be careful around chemicals
Car cleaning chemicals (e.g. paint sealants) can cause serious damage if not used properly. Also, if a particular agent works wonders on the glass, it does not mean that it can restore paint shine as well. So, makes sure to always read the label and avoid potential damages and mishaps.
Storing those chemicals is important as well. My advice is to dedicate a special storage space where you can keep all your car detailing equipment and chemicals. This place needs to be dry and protected from sunlight and excessive heat and/or cold.
2. Preparation is key!
 Car detailing should last between 2 and 4 hours. This depends on a lot of factors, though. The dirt levels on the vehicle, the condition of the paint itself, the state of the interiors, etc. If you want to keep the whole ordeal under 4 hours, make sure to get everything you need upfront:
- Clean microfiber cloths and rags, at least 5 of them
- All the chemicals, including polish, car soap, paint sealants and waxes, car upholstery cleaners, glass agents, etc.
- At least two buckets for the two-bucket system
- A vacuum cleaner with an empty bag, ready to get full
- Clay bar
- Buffer or polisher if you don’t want to polish the car manually
Wrap up
I understand that this is a lot to take in. To be completely honest, I did not like car detailing as well, not until I did it right for the first time. Nothing can replace that unique feeling – you are familiar with the vehicle, yet it feels like a new car. Besides, the act is almost therapeutic. You can play your favorite music and spend some time in the garage or on the driveway.
If you read any other guides or articles of mine, you know that I insist on regular car maintenance. The same goes for proper cleaning and detailing. During this process, you get to see the weak spots of your car and work on how to overcome and fix them. Taking your car to a professional detailer is fine too, but I guarantee that the feeling won’t be as near as awesome. Have fun detailing your car!